Every cat parent knows that moment of pure joy when your feline friend looks up at you with those adorable eyes, begging for a special treat. If you’ve ever wanted to create something truly magical for your furry companion, learning how to make tuna cat treats is the perfect way to show your love.
Homemade cat treats aren’t just about satisfying your kitty’s taste buds. They’re a heartfelt expression of care that goes beyond store-bought options. Making tuna for cats from scratch gives you complete control over ingredients, ensuring your pet gets a nutritious and delicious snack that supports their health.
Whether you’re a seasoned pet chef or a first-time treat maker, this guide will walk you through creating mouthwatering homemade cat treats that will make your feline companion purr with delight. Get ready to transform your kitchen into a gourmet cat treat workshop!
Why Homemade Tuna Treats Are Better for Your Cat
Preparing your own cat treats is not just a fun activity; it’s a big step toward better nutrition and health for your cat. These tuna treats are a fun addition to your cat’s meals. For comprehensive nutritional advice, read The Best Diet for Your Favorite Cat.
Natural Ingredients Matter
With homemade treats, you control what your cat eats. A simple tuna recipe lets you avoid bad additives found in store treats. Your cat gets the best, pure nutrition for their health.
- Eliminate unnecessary chemical additives
- Use fresh, high-quality ingredients
- Customize recipes for your cat’s specific dietary needs
Saving Money with DIY Treats
Making your own treats can save you money. Premium store treats are pricey, but homemade ones are cheaper. You’ll save money and give your cat the best nutrition.
Total Ingredient Control
Homemade treats mean you control portions and ingredients. You can tailor recipes to fit your cat’s needs, ensuring they get what they need.
Pro tip: Always consult with your veterinarian when introducing new treats to your cat’s diet.
Essential Ingredients and Kitchen Tools You’ll Need
Making tasty tuna cat treats at home is simple. You likely have most of what you need in your kitchen. Let’s look at the key ingredients and tools for making yummy treats your cat will love.
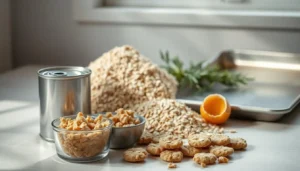
- Canned tuna (packed in water, no added salt)
- Whole wheat flour or oat flour
- One egg
- Optional catnip for extra flavor
The tools needed are basic. You’ll need:
- Mixing bowl
- Measuring cups
- Baking sheet
- Parchment paper
- Rolling pin
- Cookie cutters (optional, but fun!)
Choose high-quality tuna without extra seasonings or preservatives. Wild-caught tuna is best for your homemade treats. Using fresh ingredients makes your treats healthy and delicious.
Pro tip: Always consult your veterinarian before introducing new foods to your cat’s diet.
How to Make Tuna Cat Treats: Step-by-Step Guide
Making quick homemade cat treats is simple. Just a few ingredients and some love are needed. You’ll create tasty tuna treats that your cat will love.

First, get all your ingredients and tools ready. These treats are easy to make and will be a hit at home.
Preparing Your Workspace
Prepare a clean, organized kitchen for your cat treats. Make sure you have everything you need:
- Clean cutting board
- Mixing bowl
- Measuring cups
- Baking sheet
- Parchment paper
Mixing and Forming the Treats
When making tuna cat treats, be precise. Follow these steps:
- Drain canned tuna thoroughly
- Mix tuna with binding ingredients
- Knead the mixture until consistent
- Roll into small, bite-sized balls
- Flatten slightly on baking sheet
Baking and Storage Tips
Bake at a low temperature to keep nutrients. Pro tip: Let treats cool before storing. Store in an airtight container in the fridge for up to a week.
Homemade treats show your cat how much you care!
Safety Tips and Ingredient Substitutions
Making healthy cat treats at home is important. You need to be careful with safety and what ingredients you use. When making tuna snacks for cats, follow some key guidelines to keep your pet happy and healthy.

First, know which ingredients are safe for your cat. Some important things to remember include:
- Avoid toxic ingredients like onions, garlic, and too much salt
- Choose fresh, high-quality tuna with low mercury
- Check for any ingredients your cat might be allergic to
Cats with certain dietary needs might need special ingredients. Consider these alternatives when making healthy cat treats:
- For cats with fish allergies, use chicken or turkey as a protein source
- Try coconut or almond flour instead of regular flour
- Use salmon oil instead of fish oil for omega-3 benefits
It’s important to control how much your cat eats. Treats should only make up 10% of their daily calories. Always talk to your vet before trying new foods, even if your cat seems healthy.
Pro tip: Always introduce new treats gradually and watch for any adverse reactions.
By following these safety tips, you can make tasty and healthy tuna snacks for cats. This will keep your feline friend happy and healthy.
Best Tuna Types for Homemade Cat Treats
Choosing the right tuna for cats is key in making tasty homemade treats. Not all tuna is the same. Knowing the best types ensures your cat gets healthy and yummy food.

When picking tuna for your cat’s food, think about a few important things. These factors affect your pet’s health and happiness.
Fresh vs. Canned Tuna Choices
Fresh tuna is a great protein for your cat’s treats. You have a few good options:
- Skipjack tuna (lowest mercury content)
- Albacore tuna (moderate mercury levels)
- Wild-caught tuna varieties
Mercury Levels and Health Considerations
Mercury in tuna is a big deal for cats. Limit tuna intake to keep your cat safe. Vets suggest:
- Choosing light tuna over dark meat
- Avoiding tuna as a main food
- Rotating protein sources
Recommended Brands and Varieties
For safe tuna options, check out these brands:
- Wild Planet (low mercury)
- Safe Catch (tested for mercury)
- American Tuna (no added oils)
Always talk to your vet before adding new foods to your cat’s diet.
Troubleshooting Common Issues When Making Cat Treats
Making the perfect tuna cat treats can be tricky. When you make DIY cat treats at home, you might face some challenges. These can make even the most dedicated pet parents feel discouraged.
One common problem is texture. If your treats are too dry or crumbly, you’re not alone. This usually happens when the moisture is off. Here are some quick fixes:
- Add a little extra liquid (like tuna juice) to bind ingredients
- Use mashed fish instead of dry flakes
- Adjust your baking time to prevent over-drying
Another issue is cats not wanting to eat the treats. Your homemade cat treats might look great to you, but cats can be picky. Here are some tips to make them more appealing:
- Use fresh, high-quality tuna
- Experiment with different fish varieties
- Ensure treats are bite-sized and easy to eat
The secret to making great DIY cat treats is patience and practice. Don’t get discouraged if your first batch isn’t perfect. Each try helps you learn what your cat likes and how to make it better.
Pro tip: Always introduce new treats gradually and watch your cat’s reaction.
Remember, making homemade cat treats is about showing love and care. With a bit of persistence, you’ll make treats your cat will love.
Conclusion
Making homemade tuna cat treats is a great way to show your cat you care. You’ve learned how to make tasty and healthy snacks for your pet. These simple treats let you choose what goes into them, making them special.
This guide is just the start of your journey in making treats for your cat. Every batch you make will bring you closer to your cat. It also ensures they get the best nutrition. Try new things to find out what your cat loves most.
When making treats, safety and quality are key. Use fresh ingredients, watch how much you give, and introduce new treats slowly. Your effort shows how much you love and care for your cat.
Begin making homemade cat treats today. Your cat will love every bite of these tasty, healthy snacks. Your kitchen is now a place where you can make delicious treats for your furry friend!
FAQ
How often can I give my cat homemade tuna treats?
Give tuna treats 1-2 times a week. They should not replace your cat’s regular food. Treats should be less than 10% of their daily calories.
Are homemade tuna treats safe for all cats?
Not all cats can have tuna. Some may have allergies or dietary needs. Always talk to your vet before giving new treats, even if your cat seems fine.
Can I use any type of tuna for cat treats?
Choose plain, water-packed tuna. Avoid tuna in oil or with salt. Wild-caught, low-mercury tuna is best. Always rinse the tuna before making treats.
How long can I store homemade tuna cat treats?
Store treats in an airtight container in the fridge for 5-7 days. Freeze for up to 3 months. Always check for spoilage before serving.
My cat is a picky eater. Will they like these treats?
Cats often love tuna. But, every cat is different. If your cat doesn’t like them, try adding a bit of their favorite wet food.
Are there any ingredients I should absolutely avoid?
Yes! Avoid onions, garlic, salt, and artificial seasonings. Use only cat-safe ingredients like tuna, flour, and a bit of catnip or egg.
Can kittens eat these homemade tuna treats?
Kittens have sensitive stomachs. Wait until they’re at least six months old. Always introduce new foods slowly and in small amounts.
How can I make the treats more nutritious?
Add small amounts of catnip, egg, or nutritional yeast. These can add protein and nutrients, making the treats more interesting.
